Whitelisting PhotoMove with Windows Defender
Here are the steps to add PhotoMove 2.exe as an exception to Windows Defender.
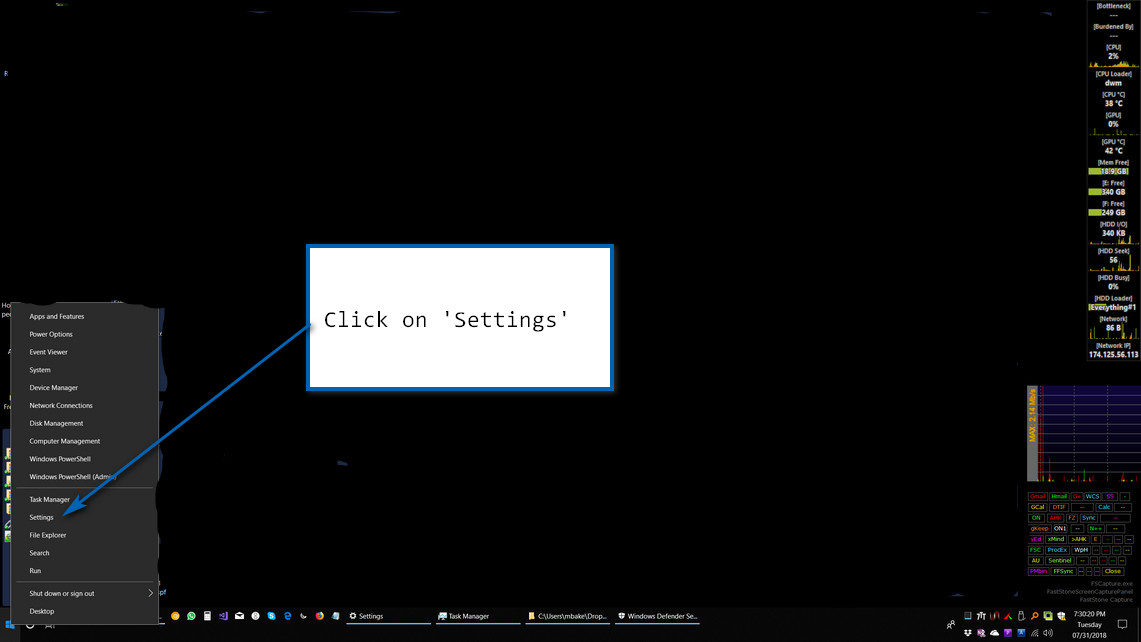
1. Right-click the Windows Start button at the bottom left corner of your screen. Click on Settings.
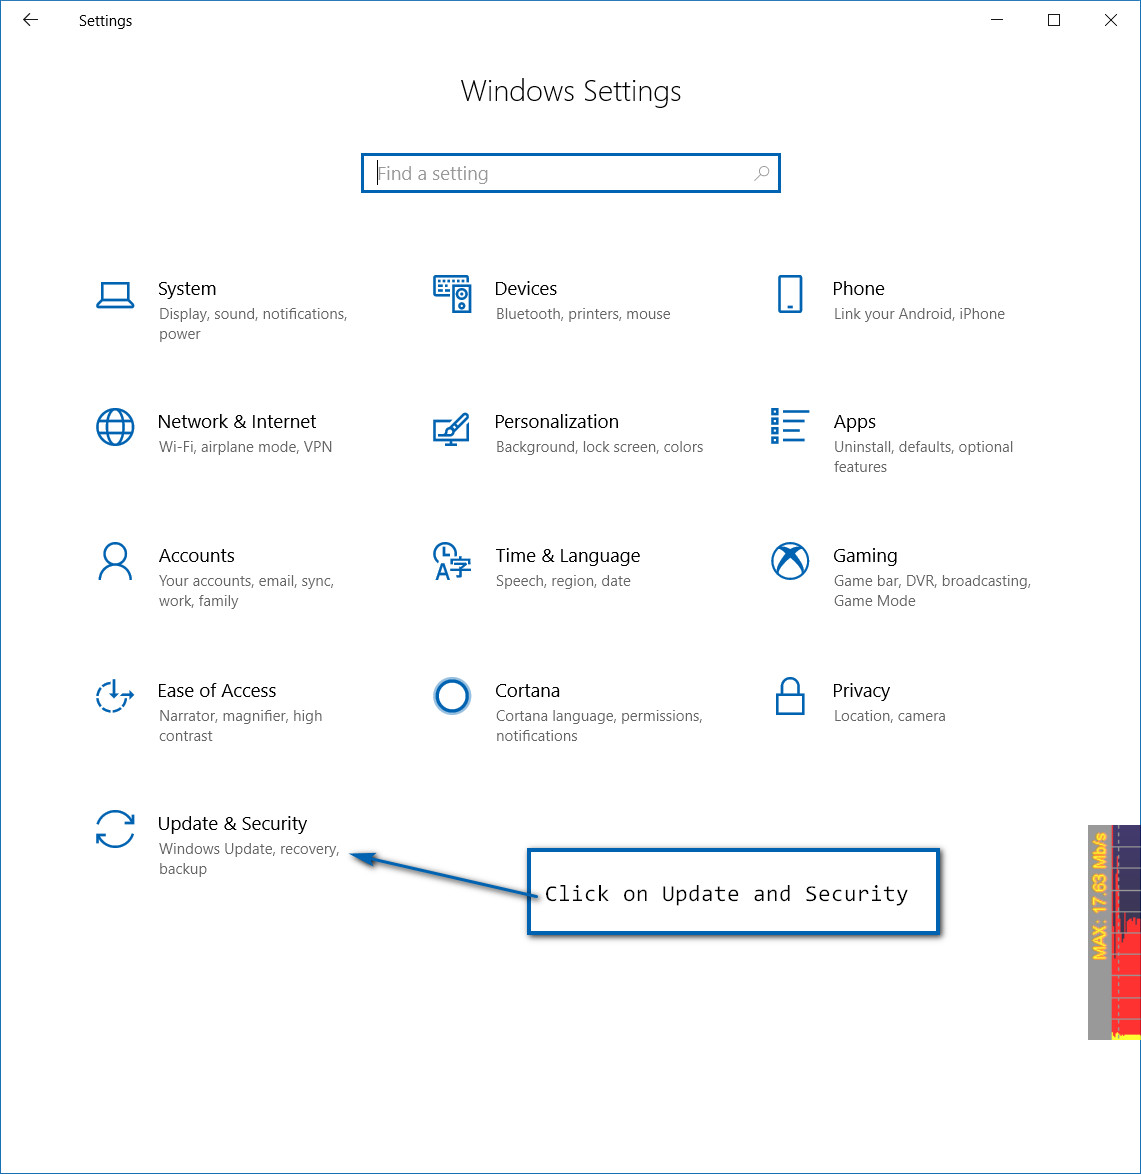
2. Click on ‘Update and Security’.
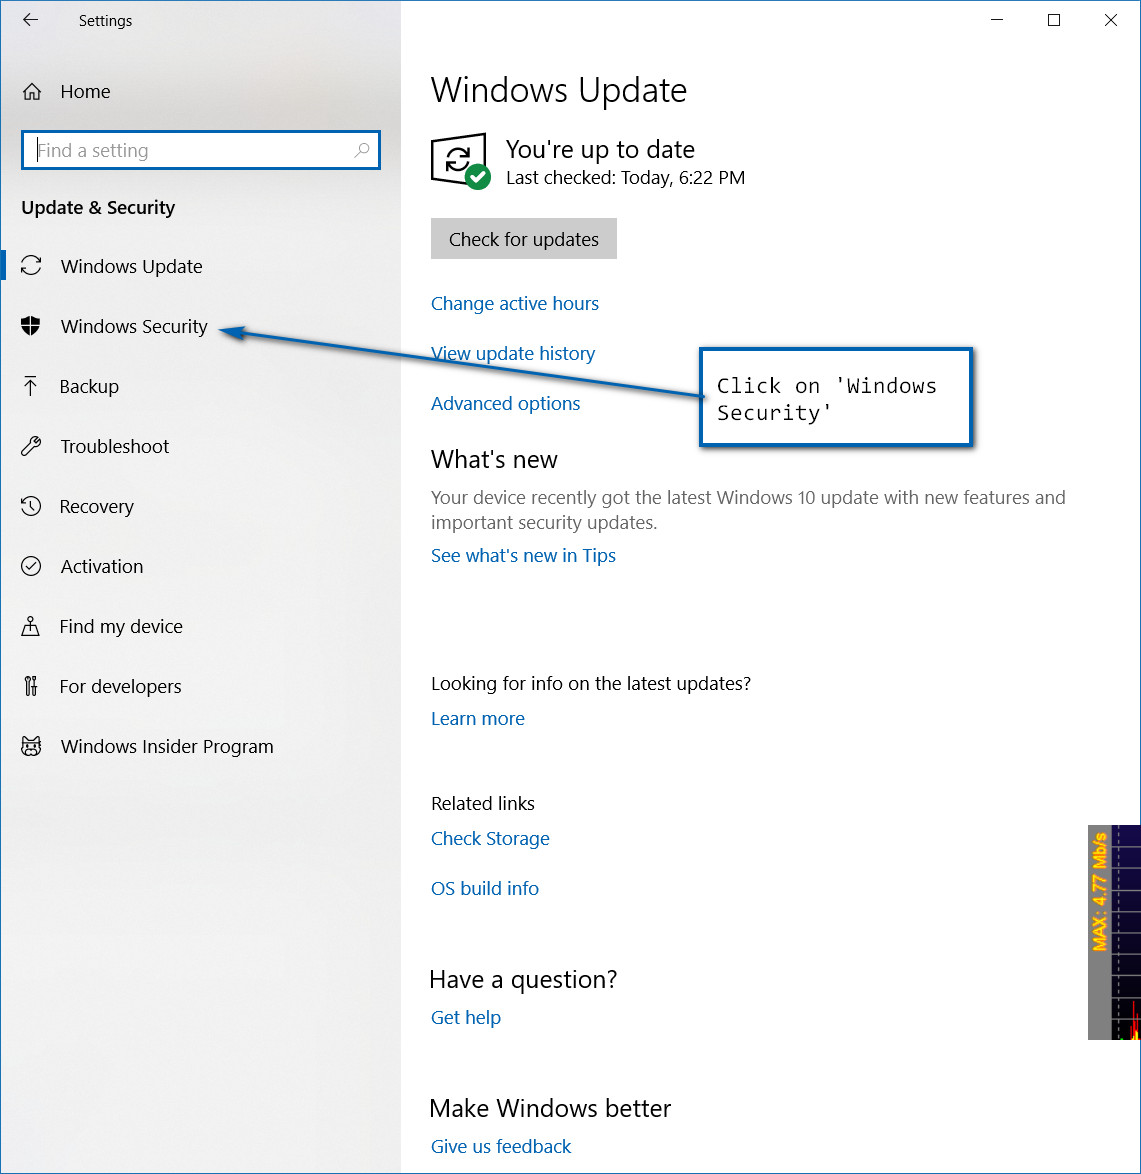
3. Click on ‘Windows Security’.
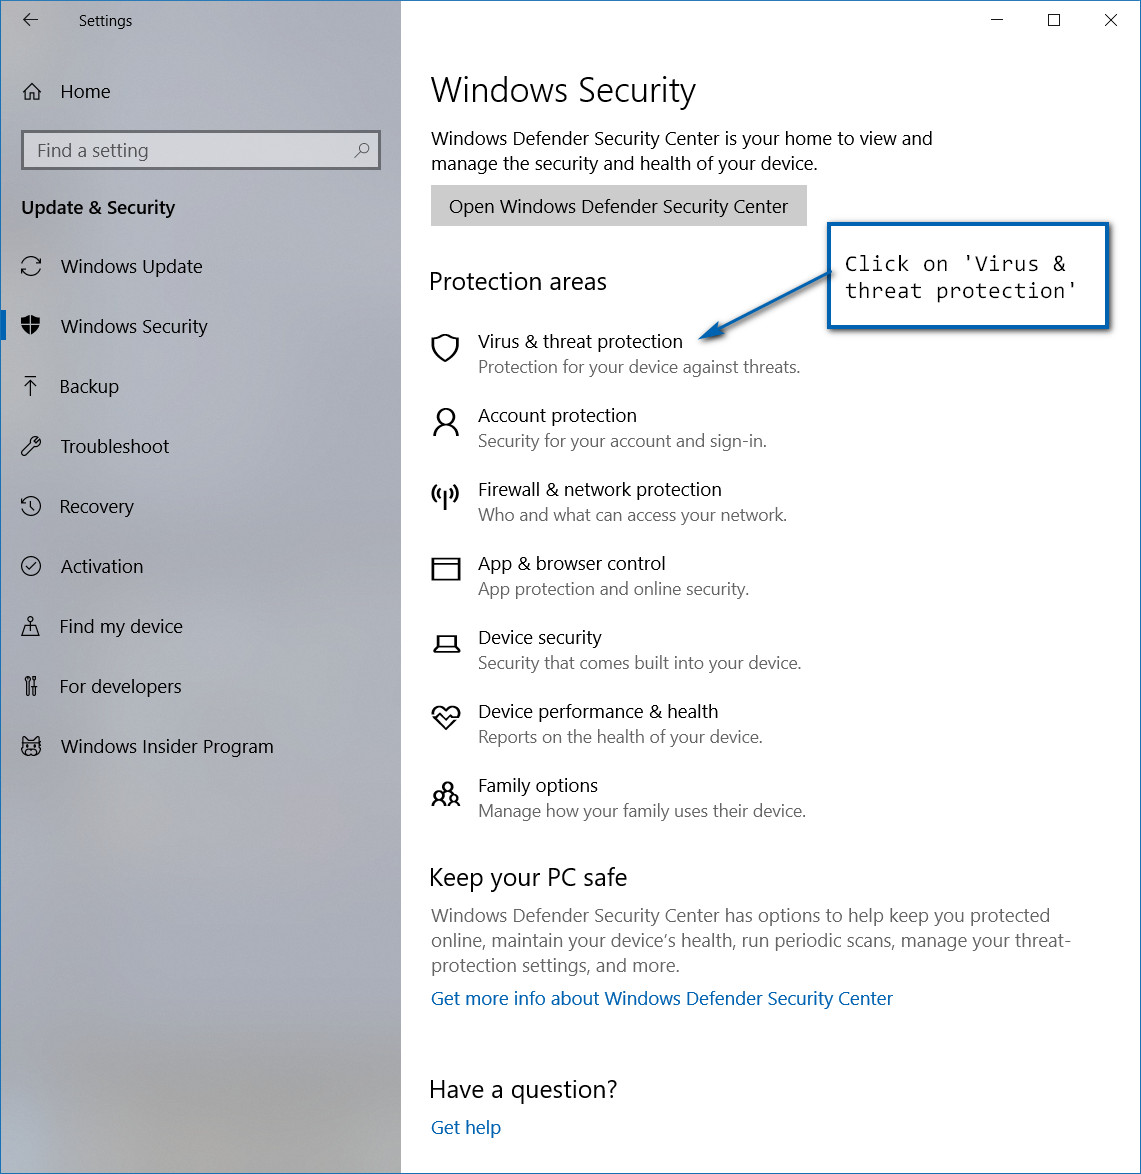
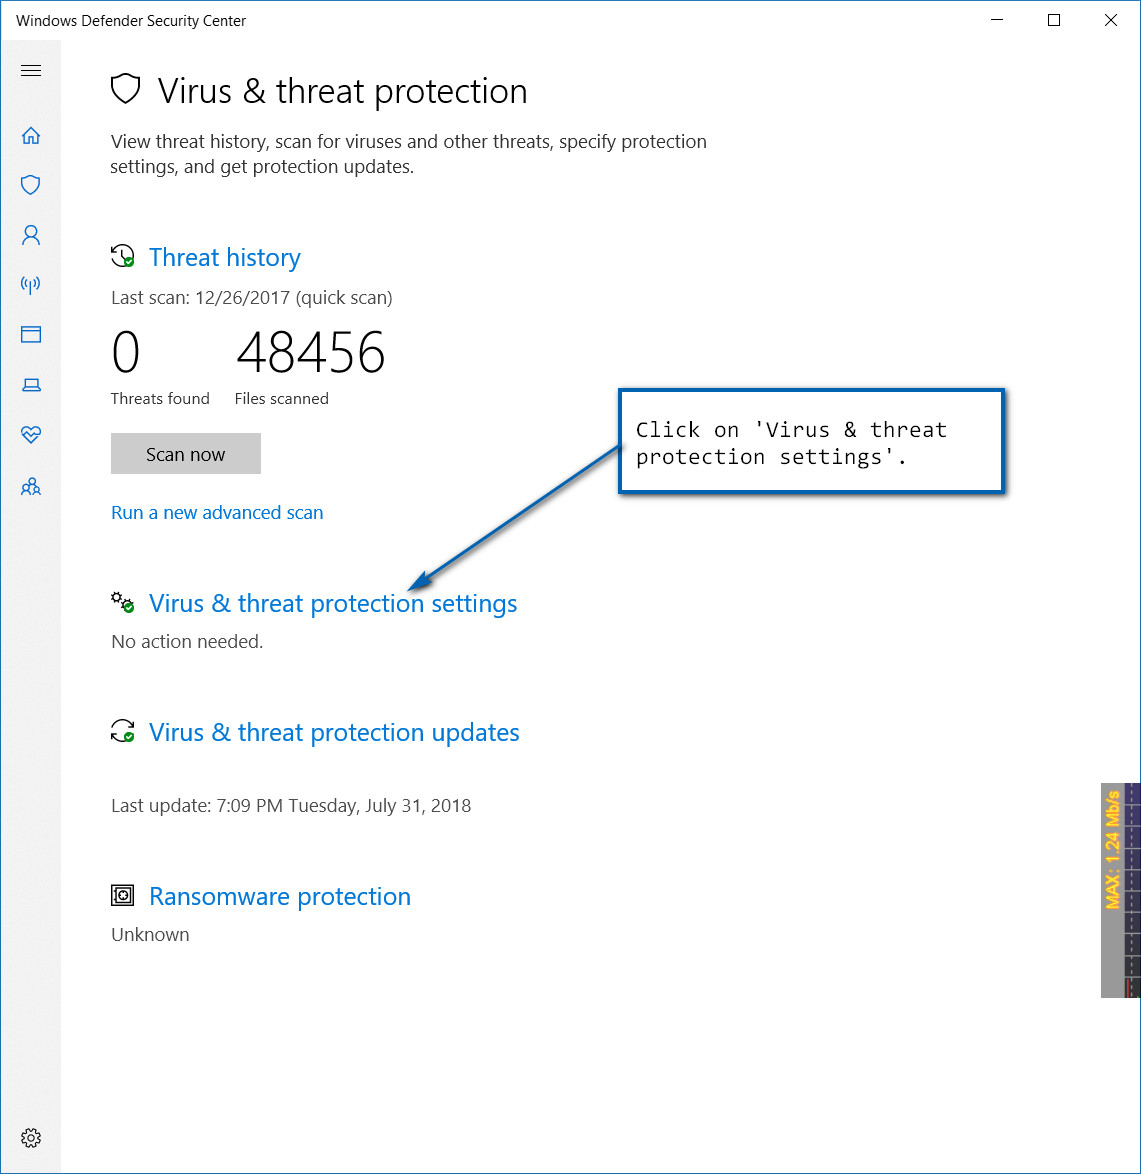
4. Click on ‘Virus & threat protection’.
5. Click on ‘Virus & threat protection settings’.
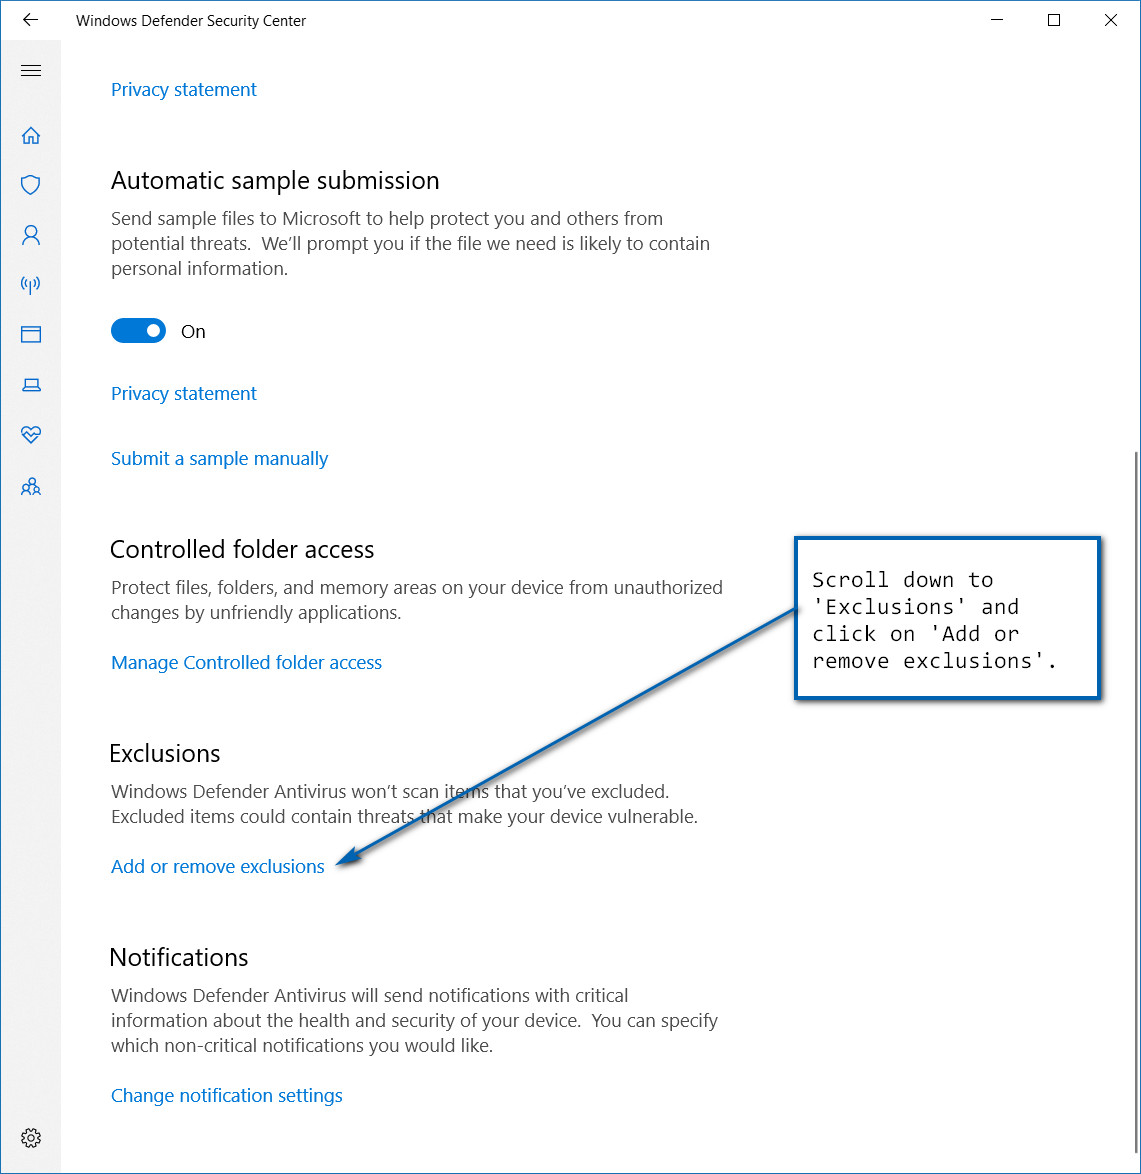
6. Scroll down to ‘Exclusions’ and click on ‘Add or remove exclusions’.
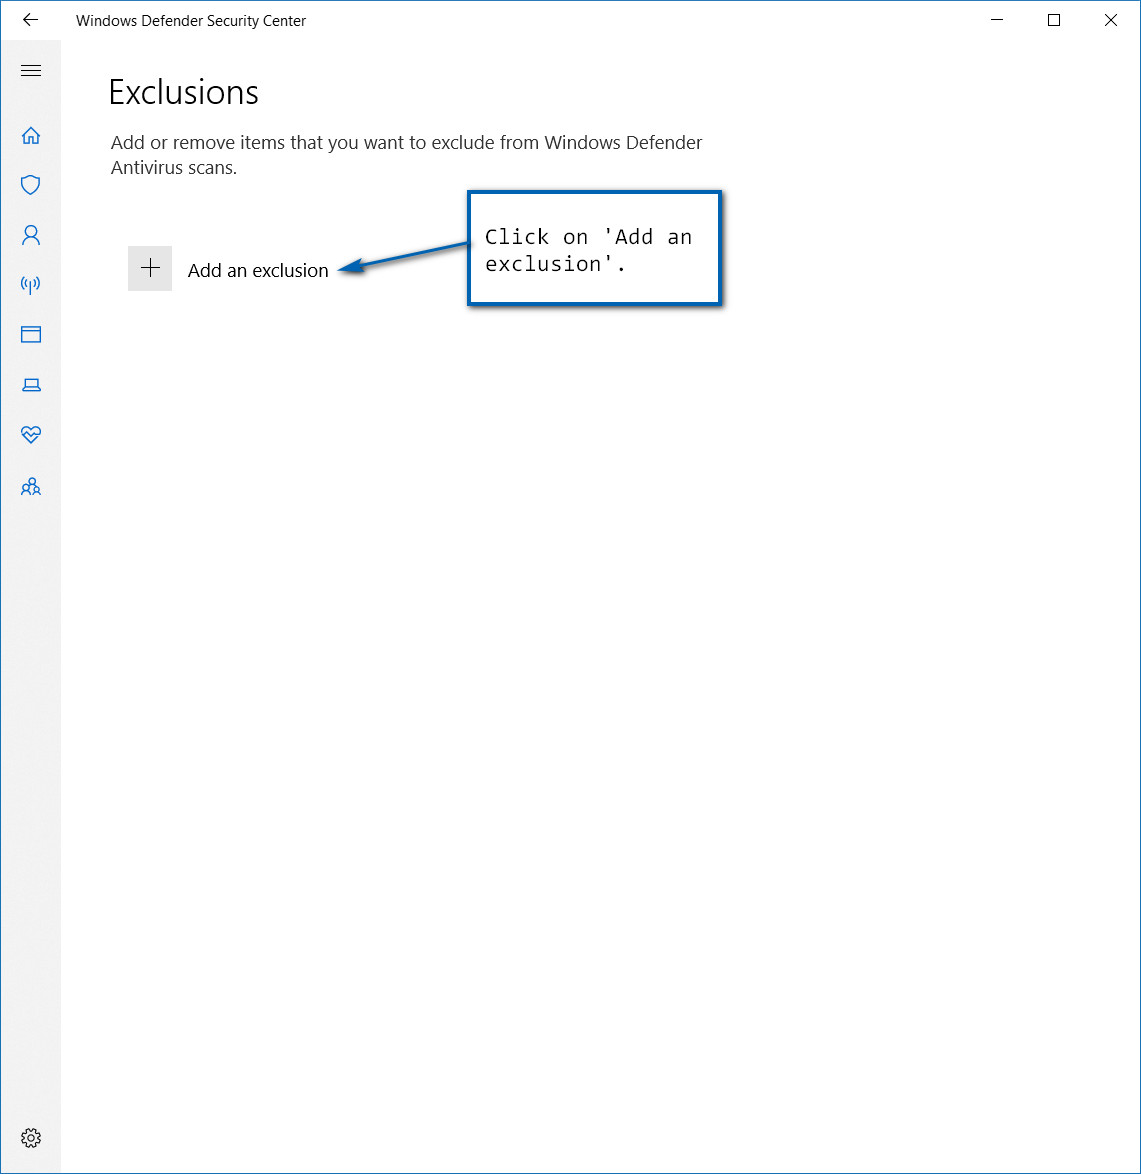
7. Click on ‘Add an exclusion’.
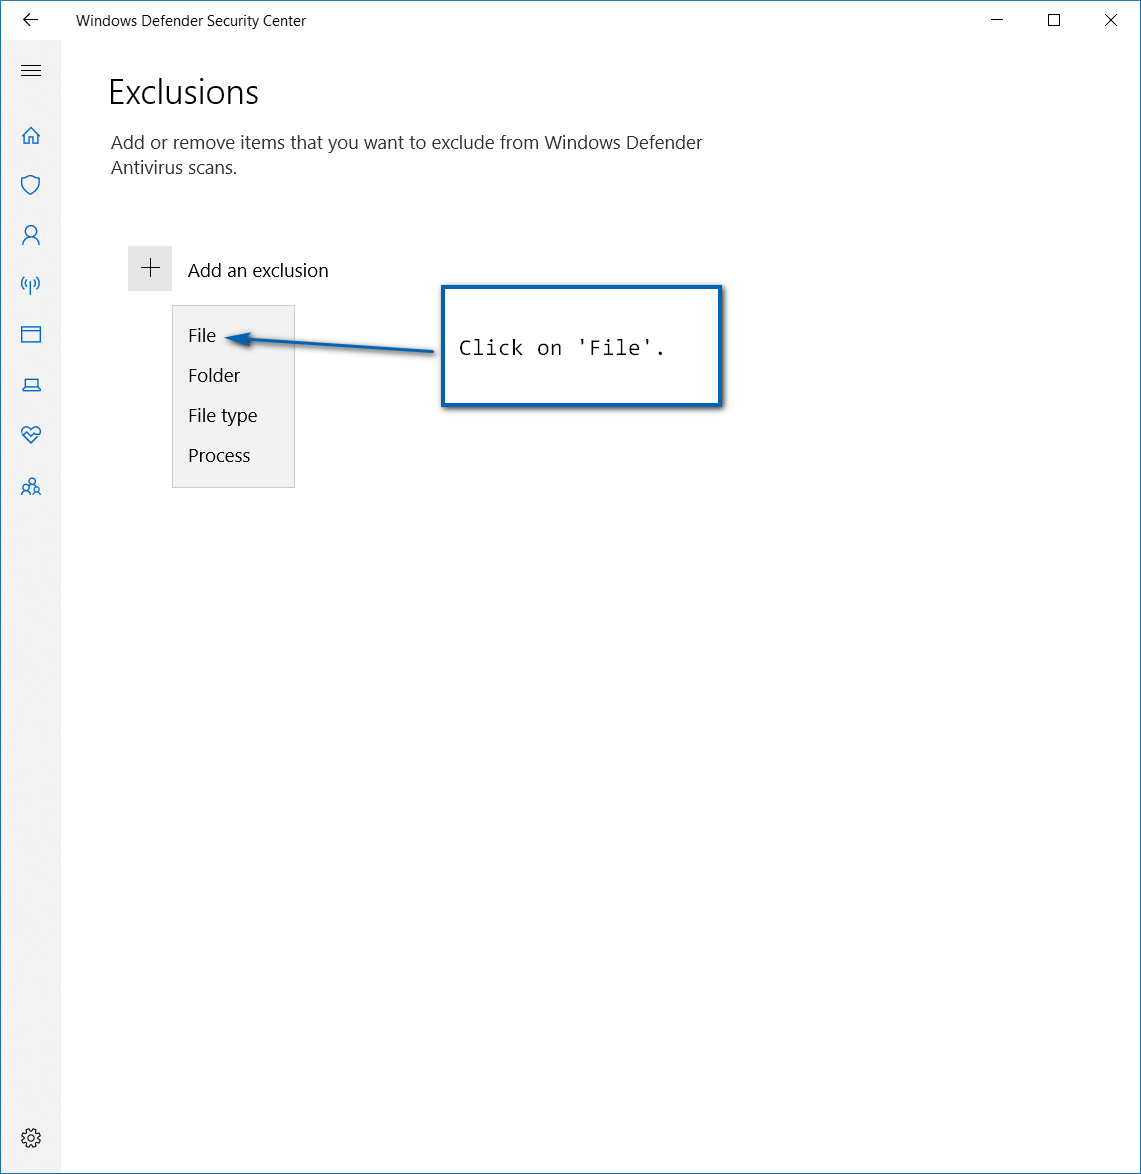
8. Click on ‘File’.
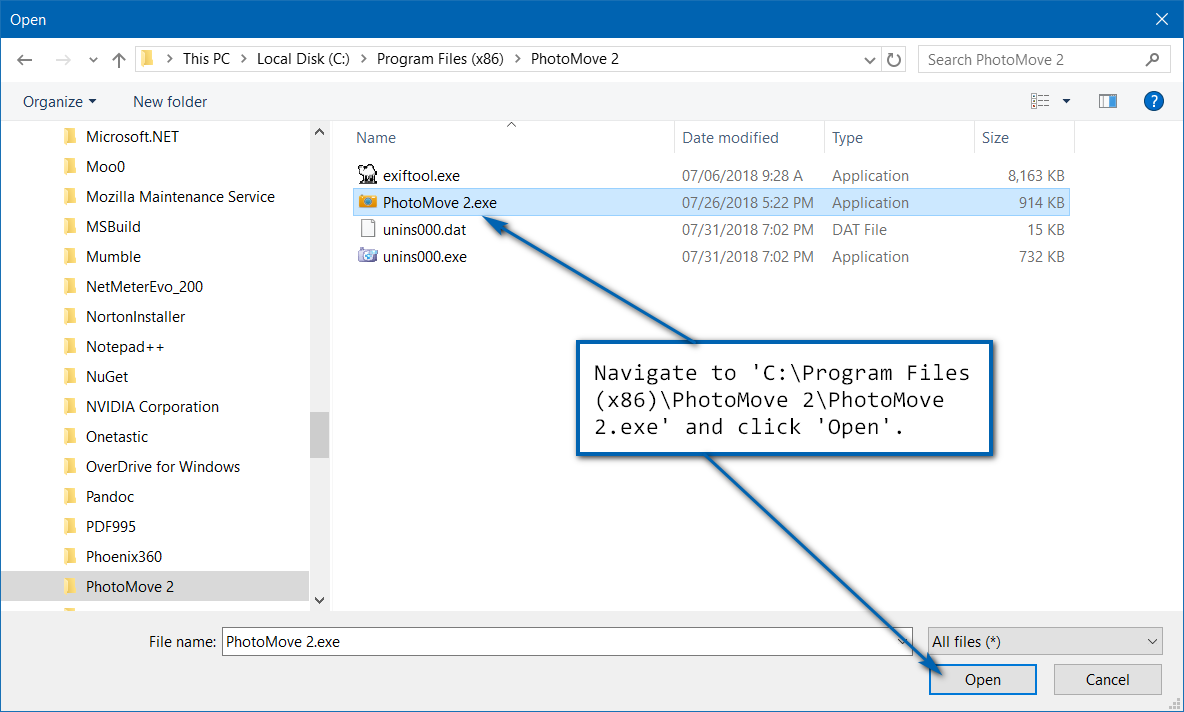
9. Navigate to ‘C:\Program Files (x86)\PhotoMove 2\PhotoMove 2.exe’ and click ‘Open’.
10. Click ‘Yes’ in the User Account Control box. Shut down your PC and restart it. Run PhotoMove to determine if it has been unblocked by Windows Defender.
Leave a Comment